
Subtitles Translator – Help & Tips
Subtitle Translation
This section discusses how you can upload subtitle files and customise their translation.
Upload Subtitles File
You can upload one or more subtitle files by clicking on the “Drop files” area, as shown below:
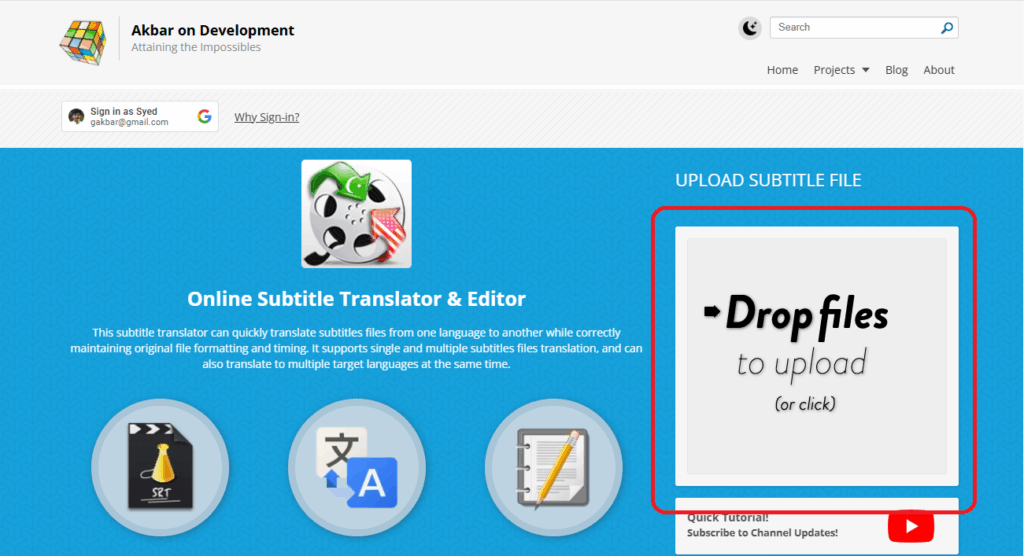
As the box title suggests, you can also drag and drop multiple files to this area.
Tip: You can upload a maximum of 20 files by default. However, if you sign in via Google on this website, as an authenticated member, you can upload and translate up to 100 files at a time.
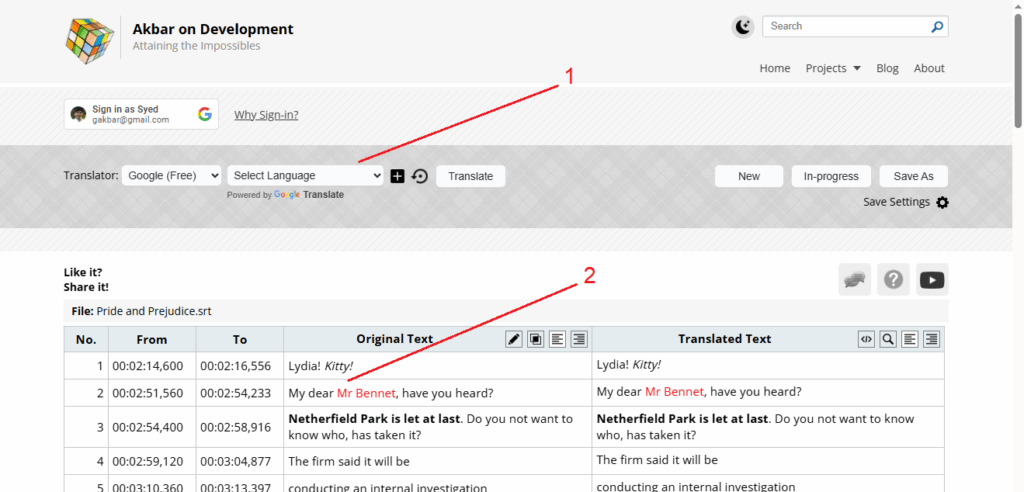
Once the file upload is complete, you will see the Translation Panel (1) as well as the uploaded file in the Subtitles Editor (2) panel as shown below:
Translation & Configurations
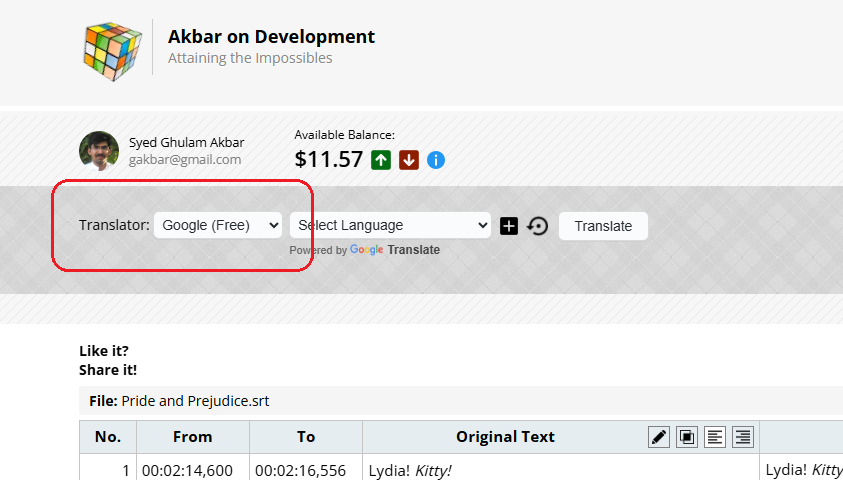
Once the source subtitles file is uploaded, the first step is to select the Machine/AI Translator you want to use for the translation:
Some translators, like Google and Yandex and totally free to use and translate an unlimited number of files. For others, like DeepL, Gemini, and OpenAI Chat-GPT, you have to pay for the translation. This is because these services don’t charge per translation token/word, and no free API is available. So I’m simply passing down the cost to you, the consumers. However, they do have better contextual translation capabilities and normally the translation is very close to the human translation for these paid translation options.
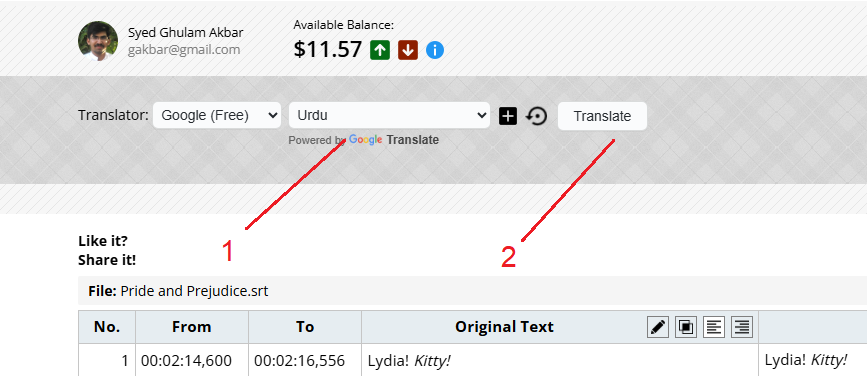
Once you have made a decision on which translator to use, select the target language from the next drop-down (1) and then click on the Translate button (2) to begin the translation:
Once the translation is complete, you should see a success message (1) and the translated subtitles are displayed in the Subtitle Editor area (2):
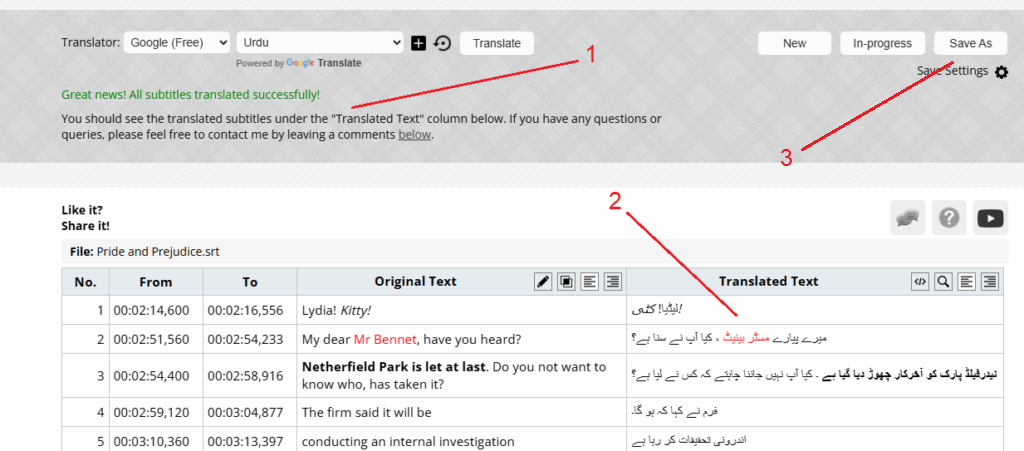
Once you have confirmed all looks good, you can download the translated subtitle file by clicking on the Save As button, as displayed above (3).
Translation Model Customisation and Special Instructions
When using Large Language Models (LLM) based translators, like OpenAI, Gemini, Anthropic Claude, etc. you can also further tweak the translation prompt to improve or customise the translation quality.
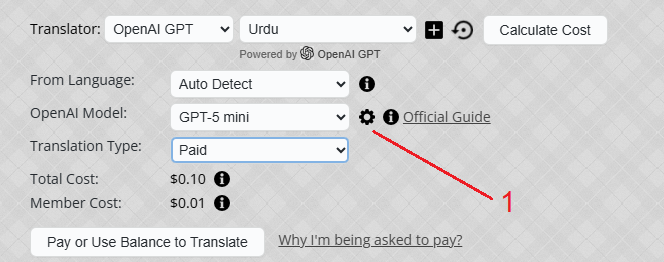
For this first click on the Gear icon next to the Model selection drop-down:
Clicking on this will expand/collapse the model config area:
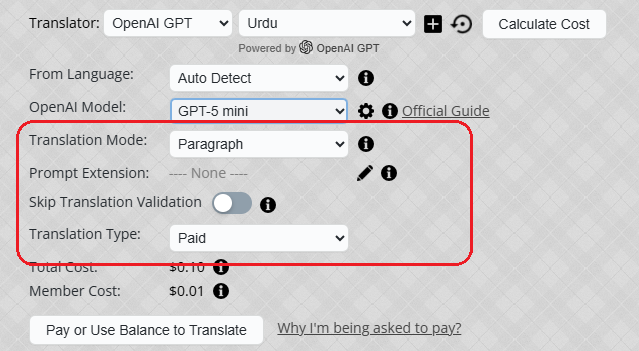
In the model config area, click on the Pencil icon next to the Prompt Extension row. This should bring up a model prompt extension dialog:

As the hints suggest, you can use the Synopsis or Additional instructions text areas to specify custom instructions or notes, which are then passed to the underlying LLM model prompt as is. This lets you further tweak the way LLM-based translator handles the translation to the selected target language.
Once you are happy with your instructions, simply click the “Apply” button to save and return. The updated instructions are then shown in the main translation panel:

Note: Since the prompt extension block is added to each translation block, where a block varies from 80-100 lines, using long prompt extensions may substantially increase the translation cost.
Subtitles Editor
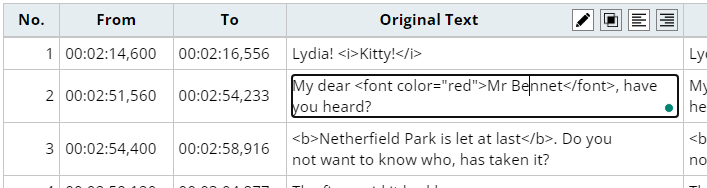
When you upload a subtitles file, it’s uploaded on the server to verify it’s valid and then all of the subtitle lines are displayed in the Subtitle Editor section as shown below:
This table shows the corresponding line/row sequence number, From and To timestamps and subtitle text for each subtitle entry. Initially, both the Original and Translated Text columns show the source subtitles, but as you “translate” the subtitles, the translated text will appear in the “Translated Text” column.
Toolbar Actions
Subtitle Editor sections show various toolbar icons above the Original and Translated text columns to let you manipulate the subtitle text before and after translations. These toolbar actions are described below:
![]() Edit Original Subtitle Text
Edit Original Subtitle Text
This toggles the editing of the text in the Original Text column. By default, only the text in the Translated Text is editable, and that’s to fine-tune to tweak the translation text as machine translations are not always perfect. However, rarely, you may also want to edit the Subtitle text to either fix some typos or change it to help the machine translator understand the overall context better. Once the editing is ON, you can change the text in the column as shown below:
You can then also download this edited original subtitles by clicking on the “Save Original” button next to the “Save As” button. Note, this “Save Original” button appears only once you have enabled original subtitles editing.
![]() Merge Original and Translated Subtitles
Merge Original and Translated Subtitles
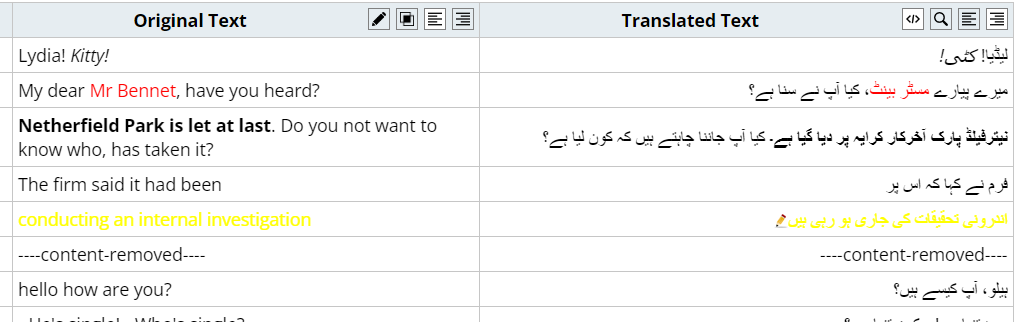
When turned ON, merge the subtitles so that both downloaded files contain both the original and translated subtitles. When this is active, both the source and translated texts are displayed in the “Translated Text” columns to give you an idea of how the subtitles will appear in the downloaded file:
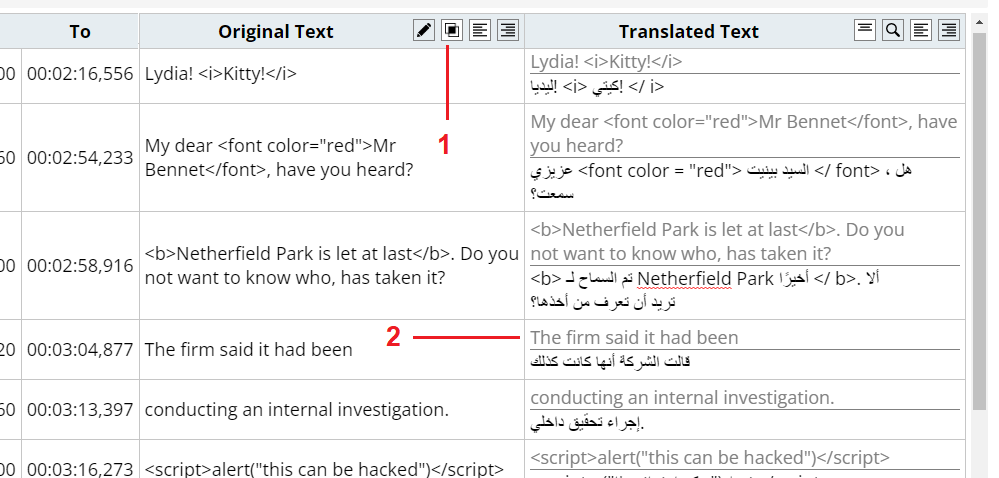
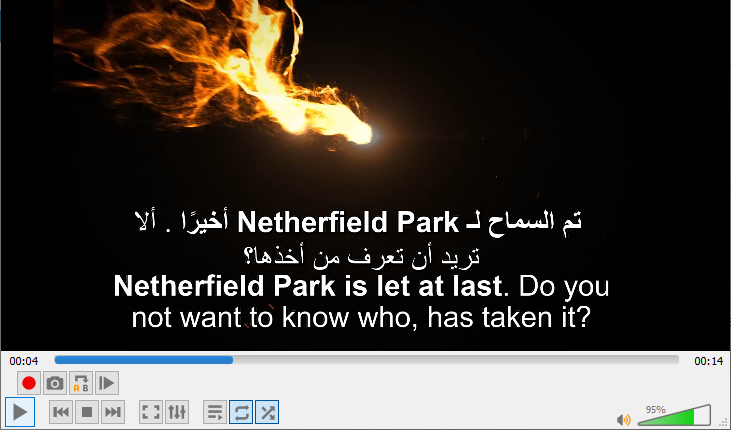
Once the merge subtitles action is ON, you can also change the direction of whether the Original subtitle is displayed at the top or bottom by clicking the icon displayed at the top of the Text column. The video player will then show both original and translated subtitles as shown below:
![]() Left Align Subtitles
Left Align Subtitles
Left-align the subtitles visually in the editor. This action button is available in both the Source and Translated Text columns and changes the alignment of the text in the corresponding columns.
![]() Right Align Subtitles
Right Align Subtitles
Right-align the subtitles visually in the editor. You can apply this formatting for languages that are read from right to left, like Arabic, Urdu, Hebrew, etc. This action button is also available in both the Source and Translated Text columns and changes the alignment of the text in the corresponding columns.
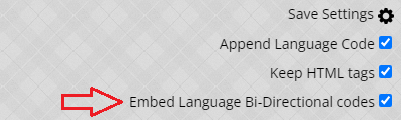
Note that when you have this Right-alignment applied to translated subtitle files and the “Embed Language Bi-Directional codes” Save Setting is also ON, the downloaded subtitle files contain special Unicode Marker characters embedded in each subtitle row so that translated text appears with the correct direction when playing videos with subtitles.
![]() Toggle HTML Display
Toggle HTML Display
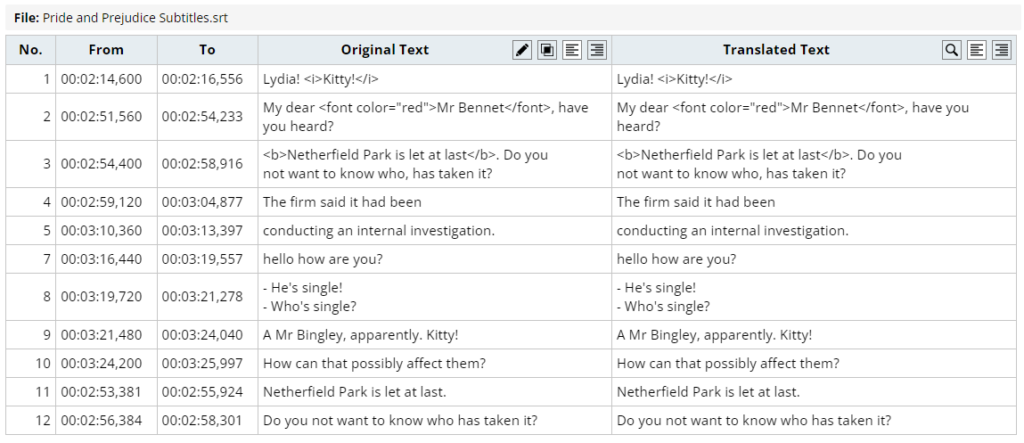
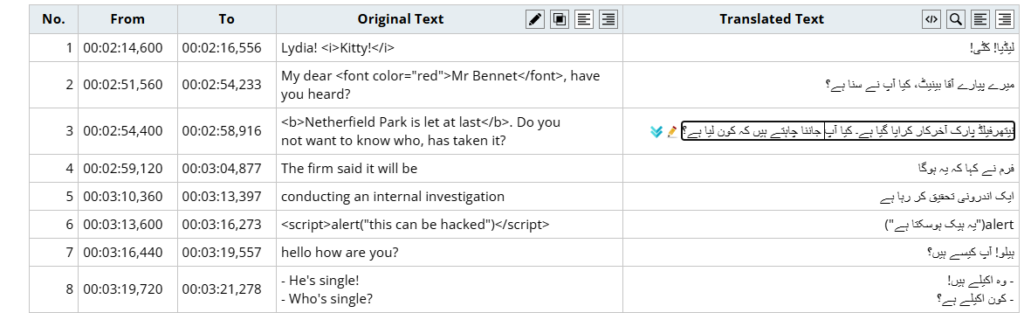
By default, any HTML tags in the subtitles are encoded so that you can visually see and edit these tags. However, for some of the content, it’s much easier and quick if you can visually see the rendered HTML. You toggle the HTML display using this toolbar icon. For example, here is how the above subtitle file appears with HTML tags turned ON:
![]() Find & Replace Words
Find & Replace Words
Clicking on this icon button opens a dialog where you can type in the words to match and replace as under the “Translated Text” columns only. Here is how this dialog appears:
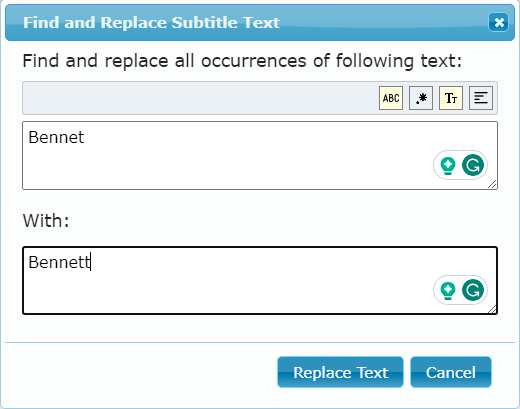
This Find and Replace feature is pretty powerful, and you can control the exact behaviour by toggling the various action icons. These are briefly described below:
 Find & Replace Whole Words Only: This is ON by default and will force the replacement of whole words only. For example, if you type “For” in the find text area, this will search and replace all occurrences of “For”, but will not change it if it’s part of another word, e.g. “Forgiving” or “Form”, etc.
 Regular Expression Search: When this is ON, it treats the typed string in the find block asa Regular Expression. This makes it possible to replace more than one word and pattern. If you haven’t already used Regular Expressions, you can read more about them here. One good tool to build and test RegExp is regex101.
 Toggle Case Sensitivity: When turned ON, it only matches the words that are in the same case. For example, when this flag is ON, and you type “my” in the find block, then it will not match “MY” or “My” words in the translated text columns.
 Replace Multiple Words: When this flag is ON, you can type in a unique word or RegExp pattern per line in the Find and Replace text boxes. Then it will replace the word at the 1st index with the word in the replace block at the 1st index, and similarly will replace the word at the 2nd index with the word in the 2nd index in the replaced block, and so on. You can use this to build a list of all the words that machine translation usually gets wrong and replace these with correct words in a single step.
Subtitles Editing
After the translation is done, you can also manually tweak/refine the translation by clicking on the Translated Text row. This would enable interactive editing of the content as shown below:
You can also bring a single row change dialog by clicking the Pencil icon. Which opens up a dialog where you can review the existing text and change it – similar to Find & Repalce dialog above.
Shift Subtitles Rows
When using some new LLM translators, like Chat-GPT, Gemini, etc, it’s possible that some lines are shifted up or down incorrectly. This is because the translation is performed on these models for the best quality. In simple words, the way it works is that source subtitles lines are first cleaned and merged into a single paragraph (with some special row markers), and then that paragraph is passed to AI model for translation. After the translation, the translated paragraph is split back to match the source rows based on the special row marker tags.
However, sometimes, the row marker tag is wrongly trimmed by the AI model, and thus translated content may not align with the corresponding timing of the source rows. In this situation, a manual review, fixing and shifting of the translated lines may be required. That’s when the rows shift action is handy. You can access it by clicking on the Shift icon (![]() ) as shown below:
) as shown below:
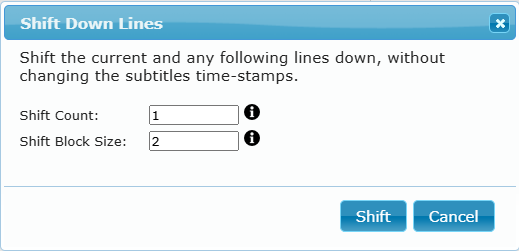
So, for example, if you want to move a batch of 2 lines down in a local segment/block of 10 rows, you would type “2” and “10” in the above input boxes, respectively. If you want to shift, say line#10, all the way to the end of the file, then you can also clear the “Shift Block Size” field, so that the block/segment is the full file.
Re-translate Lines Block
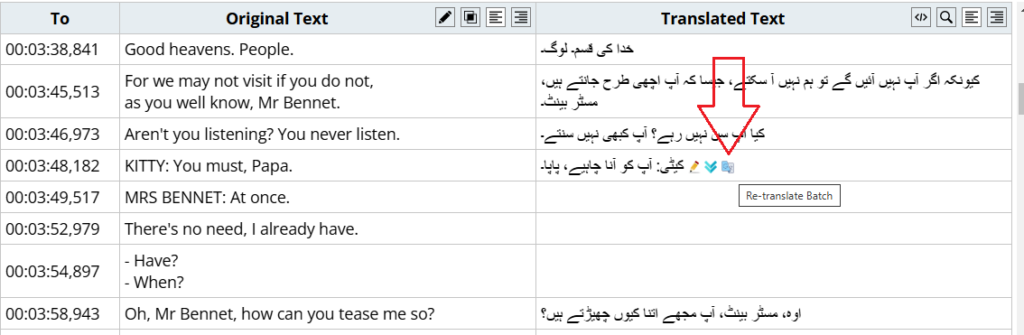
While LLM translation models (e.g. OpenAI, Gemini, etc) are great and normally do great at the translation, they sometimes do mix-up or ignore the translation prompts, and thus either don’t translate blocks of line at all, or translate the line(s) but mix up the timings. Thus, causing a set of lines to be bad in an otherwise perfect translation. You can either fix these lines manually during review, or auto-retranslate such block of lines to see if the translation engine works better this time.
To fix up or re-translate a line block, once the translation is finished, click on the “Re-translate Batch” icon in the translated rows as shown below:
Clicking this icon button brings up the following lines batch configuration dialog:
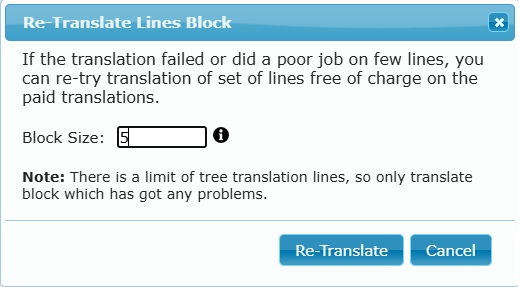
You just enter the number of the following lines to re-translate and click the “Re-translate” button to start it. As the translation begins, progress is displayed and updated translations are auto-updated in the Translated panel once they finish.
Please note that, as there is a limit on the re-translation tries, you should only select the number of lines that would benefit from the re-translation. If there are more failures than you can fix manually, please report this back to me, and I will see if I can further tweak the main prompt to make it work better in most cases.
Feedback & Comments
No Responses